Understanding the Basics: Introduction to Disposable Cameras and Digital Conversion
Alright, picture this: you stumble upon a dusty old box in your attic, and lo and behold, you find a forgotten treasure - a disposable camera from the 90s! Now, before you start wondering if you can travel back in time with it, let me introduce you to the wonders of digital conversion. Yes, my friends, you can transform that ancient relic into a modern marvel. With a little bit of tinkering and a whole lot of patience, you can convert your disposable camera into a digital powerhouse. Say goodbye to the days of blurry prints and limited exposures, and say hello to the world of pixels and instant gratification. So grab your screwdriver and get ready to embark on a journey of photographic resurrection!
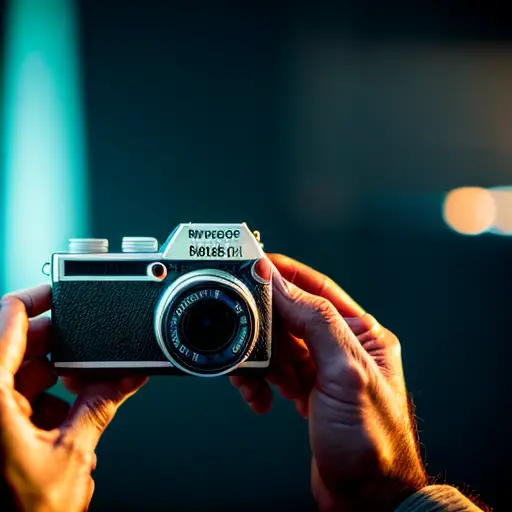
Gathering the Tools: Essential Equipment and Materials for Converting a Disposable Camera
An interesting fact about converting a disposable camera to digital is that it can be done using a Raspberry Pi, a credit card-sized computer. By connecting the Raspberry Pi to the disposable camera's flash capacitor, it is possible to trigger the camera's shutter and capture images digitally. This process involves programming the Raspberry Pi to send a signal to the flash capacitor, which then activates the camera's shutter mechanism. This innovative method allows photography enthusiasts to repurpose old disposable cameras and explore the world of digital photography in a unique way.
Alright, fellow adventurers, before we dive headfirst into the world of disposable camera conversion, let's make sure we have all the necessary tools and materials at our disposal. First things first, you'll need a trusty screwdriver to dismantle that disposable camera and unlock its hidden potential. Don't forget a pair of tweezers to delicately handle those tiny components. Now, let's talk about the heart of the operation - the digital image sensor. This little gem will replace the film inside the camera and capture your digital masterpieces. And of course, we can't forget about the wires, soldering iron, and a dash of patience to bring it all together. So gather your tools, my friends, and let's embark on this DIY adventure of turning a humble disposable camera into a digital marvel!
Step-by-Step Conversion Process: Converting a Disposable Camera to a Digital Device
Step 1: Dismantle and Assess The first step in our grand conversion process is to carefully dismantle the disposable camera. Grab your trusty screwdriver and start removing the screws, keeping them safe in a container. Once you've opened up the camera, take a moment to assess its inner workings. Locate the film compartment and gently remove the film, making way for the digital image sensor that will soon take its place.
Step 2: Prepare the Digital Image Sensor Now that we've bid farewell to the film, it's time to prepare the digital image sensor. This little powerhouse will capture the light and transform it into digital magic. Carefully attach the sensor to the designated spot inside the camera, ensuring a secure connection. This is where your soldering skills might come in handy, as you'll need to make sure all the wires are properly connected to the sensor.
Step 3: Wiring and Connections Speaking of wires, it's time to tackle the intricate wiring and connections. This step requires a steady hand and a keen eye for detail. Follow the camera's original wiring diagram and connect the necessary wires to the digital image sensor. Take your time to ensure each wire is securely attached, as any loose connection could result in a less-than-optimal digital experience.
Step 4: Test and Troubleshoot With the wiring complete, it's time to put your newly converted camera to the test. Insert a memory card into the designated slot and power up the camera. If all goes well, you should be greeted with a digital display and a newfound sense of accomplishment. However, if you encounter any issues, don't panic! Troubleshooting is part of the process. Double-check your connections, consult online resources, or seek help from fellow camera enthusiasts to overcome any obstacles.
Step 5: Capture and Enjoy Congratulations, my friend! You've successfully converted a disposable camera into a digital device. Now it's time to unleash your inner photographer and start capturing moments like never before. Experiment with different settings, play with exposure, and let your creativity run wild. Remember, this DIY project is all about having fun and embracing the unexpected. So go forth, snap away, and enjoy the fruits of your labor in the world of digital photography!
Enhancing Your Digital Disposable Camera: Tips for Improving Image Quality and Functionality
A fun fact about converting a disposable camera to digital is that it can be done using a Raspberry Pi, a small and affordable computer. By connecting the camera's circuit board to the Raspberry Pi, you can capture images digitally and even add additional features like filters or image effects. It's a creative and tech-savvy way to give new life to an old disposable camera!
Now that you've successfully converted your disposable camera into a digital wonder, it's time to take it to the next level. To enhance the image quality and functionality of your newfound device, there are a few tips and tricks to keep in mind. Firstly, consider investing in a high-quality lens attachment to expand your shooting capabilities and achieve sharper images. Additionally, explore the settings menu of your camera to adjust exposure, white balance, and other parameters to suit your desired aesthetic. Don't forget to regularly update the firmware of your digital camera to ensure optimal performance and access to the latest features. Lastly, embrace the power of post-processing by utilizing photo editing software to fine-tune your images and unleash your creative vision. With these tips in your arsenal, your converted disposable camera will truly shine as a versatile and capable digital companion.